Home>diy>Architecture & Design>How To Design A House Floor Plan In AutoCAD
Architecture & Design
How To Design A House Floor Plan In AutoCAD
Modified: February 28, 2024
Learn how to design a house floor plan in AutoCAD with our comprehensive guide. Discover the key steps and techniques from experts in architecture design.
(Many of the links in this article redirect to a specific reviewed product. Your purchase of these products through affiliate links helps to generate commission for Storables.com, at no extra cost. Learn more)
Introduction
Welcome to the world of architecture and design! Whether you’re a professional architect or a passionate individual looking to design your dream house, AutoCAD is an incredibly powerful tool that can help you bring your ideas to life. With AutoCAD’s extensive features and capabilities, you can create detailed and accurate house floor plans that will serve as the foundation for your architectural masterpiece.
In this article, we will guide you through the process of designing a house floor plan in AutoCAD. We will cover everything from understanding the basics of AutoCAD to finalizing your floor plan with dimensions, annotations, and furniture. So, grab your creative hat and let’s dive into the fascinating world of architectural design!
Before we begin, it’s important to note that designing a house floor plan requires a certain level of technical knowledge and an understanding of architectural principles. However, don’t let that intimidate you! With a little practice and our step-by-step guide, you’ll soon become a pro at creating stunning floor plans in AutoCAD.
So, without further ado, let’s get started with Step 1: Understanding the Basics of AutoCAD.
Key Takeaways:
- Mastering AutoCAD’s basics and understanding the requirements are crucial for creating a detailed and accurate house floor plan. Embrace creativity and practice to become a pro in architectural design.
- Adding dimensions, annotations, furniture, and fixtures brings your floor plan to life, providing a realistic representation of your dream home. Stay open to feedback and continuous refinement for the best outcome.
Read more: How To Design A House Plan Using AutoCAD
Step 1: Understand the Basics of AutoCAD
Before you begin designing your house floor plan in AutoCAD, it’s essential to familiarize yourself with the basic tools and features of the software. AutoCAD is a computer-aided design (CAD) program that allows you to create precise and accurate drawings. Here are a few key concepts to get you started:
- User Interface: AutoCAD has a user-friendly interface that consists of various menus, toolbars, and panels. Take some time to explore and familiarize yourself with the different elements of the interface.
- Commands: AutoCAD operates using commands that allow you to perform specific actions. You can access commands through menus, toolbars, or by typing them directly into the command line.
- Drawings: In AutoCAD, you create drawings on a virtual canvas called the “drawing space.” This is where you’ll be designing your house floor plan.
- Layers: Layers allow you to organize your drawing by separating different elements. For example, you can assign walls to one layer, doors to another, and so on. This makes it easier to work with individual components of your floor plan.
- Coordinates: AutoCAD uses a coordinate system to determine the position of objects on the drawing space. Understanding how to navigate and work with coordinates is crucial for accurate design.
To master these basics, you can explore AutoCAD tutorials and online resources, or consider taking a course to enhance your skills. Once you feel comfortable with the fundamentals, you’ll be ready to dive into designing your house floor plan!
Now that you have a solid foundation in AutoCAD, let’s move on to Step 2: Gathering the Requirements for Your House Floor Plan.
Step 2: Gather the Requirements for Your House Floor Plan
Before you start designing your house floor plan, it’s crucial to gather all the necessary requirements and information. This step lays the foundation for the design process and ensures that you create a floor plan that meets your specific needs and preferences. Here are a few essential considerations:
- Size and Layout: Determine the size and layout of the house you want to design. Consider the number of bedrooms, bathrooms, living areas, and any additional spaces you require, such as a study or a gym.
- Style and Aesthetics: Decide on the architectural style and aesthetics of your house. Do you prefer a modern, minimalist design or a more traditional and ornate look? Have an idea of the overall theme and feel you want to achieve.
- Functionality: Consider how you plan to use each space in the house. Will you need separate workspaces, a spacious kitchen, or open concept living areas? Think about how the different rooms will flow and interact with each other.
- Building Codes and Regulations: Familiarize yourself with the local building codes and regulations. Each area may have specific requirements regarding setbacks, heights, and other factors that must be considered when designing your floor plan.
- Accessibility: Take accessibility into account, especially if you have specific requirements such as ramps or wider hallways for wheelchair accessibility. It’s important to design a house that is inclusive and accommodates the needs of all occupants.
- Outdoor Spaces: Consider any outdoor spaces you want to include, such as a patio, deck, or garden. Think about how these spaces will connect to the interior design and how they will enhance your overall living experience.
By gathering these requirements, you’ll have a clear vision of what you want to achieve with your house floor plan. It will also help you communicate your ideas effectively to the design team or contractors if you’re working with professionals.
With the requirements in hand, you’re now ready to move on to Step 3: Starting a New AutoCAD Drawing. Stay tuned for the next step in our guide!
Step 3: Start a New AutoCAD Drawing
Now that you have gathered all the requirements for your house floor plan, it’s time to start a new drawing in AutoCAD. Follow these steps to begin your design process:
- Launch AutoCAD: Open AutoCAD on your computer by double-clicking on the program icon. Once it’s launched, you’ll be greeted with the AutoCAD home screen.
- Create a New Drawing: Click on the “Create New Drawing” option or select “New” from the “File” menu to create a new drawing file. This will open a blank canvas for you to start your design.
- Select the Template: AutoCAD offers various template options to choose from. Select the one that best suits your requirements. You can choose a blank template or one specifically designed for architectural purposes.
- Set the Units: Before you begin drawing, you need to set the units for your drawing. For architectural designs, it’s common to use either inches or millimeters. Go to the “Units” option in the “Drawing Setup” or “Drawing Utilities” menu and choose the appropriate units.
- Save Your Drawing: Once you’ve set up your new drawing, it’s essential to save it to your preferred location on your computer. Use a descriptive name for the file to easily identify it later.
Congratulations! You have successfully started a new AutoCAD drawing and are ready to begin designing your house floor plan. Remember to save your work regularly as you progress through the design process.
In the next step, we will guide you through setting up the drawing space and configuring the necessary settings to create your house floor plan. Stay tuned for Step 4: Setting Up the Drawing Space!
Step 4: Set Up the Drawing Space
Now that you have started a new AutoCAD drawing, it’s time to set up the drawing space to create your house floor plan. Follow these steps to configure the necessary settings:
- Zoom and Pan: Use the zoom and pan tools to navigate and view your drawing space effectively. Zoom in and out to get a closer look at specific areas or zoom out to see the entire floor plan.
- Viewport Setup: If you plan on printing or presenting your house floor plan, you can set up viewports for different scales and orientations. This allows you to have multiple views of your plan within the same drawing file.
- Grid and Snap settings: Enable the grid and snap settings to help you draw accurately. The grid provides a visual reference, and the snap setting ensures that your lines and objects snap to specific points on the grid, making your drawings more precise.
- Ortho and Polar Tracking: Utilize the ortho and polar tracking tools for drawing straight lines horizontally, vertically, or at specific angles. These tools assist in creating clean and aligned walls and objects in your floor plan.
- Layer Management: Before you start drawing, set up layers to organize and separate different elements of your floor plan. Create layers for walls, doors, windows, furniture, and others. This makes it easier to edit and manage individual components of your design.
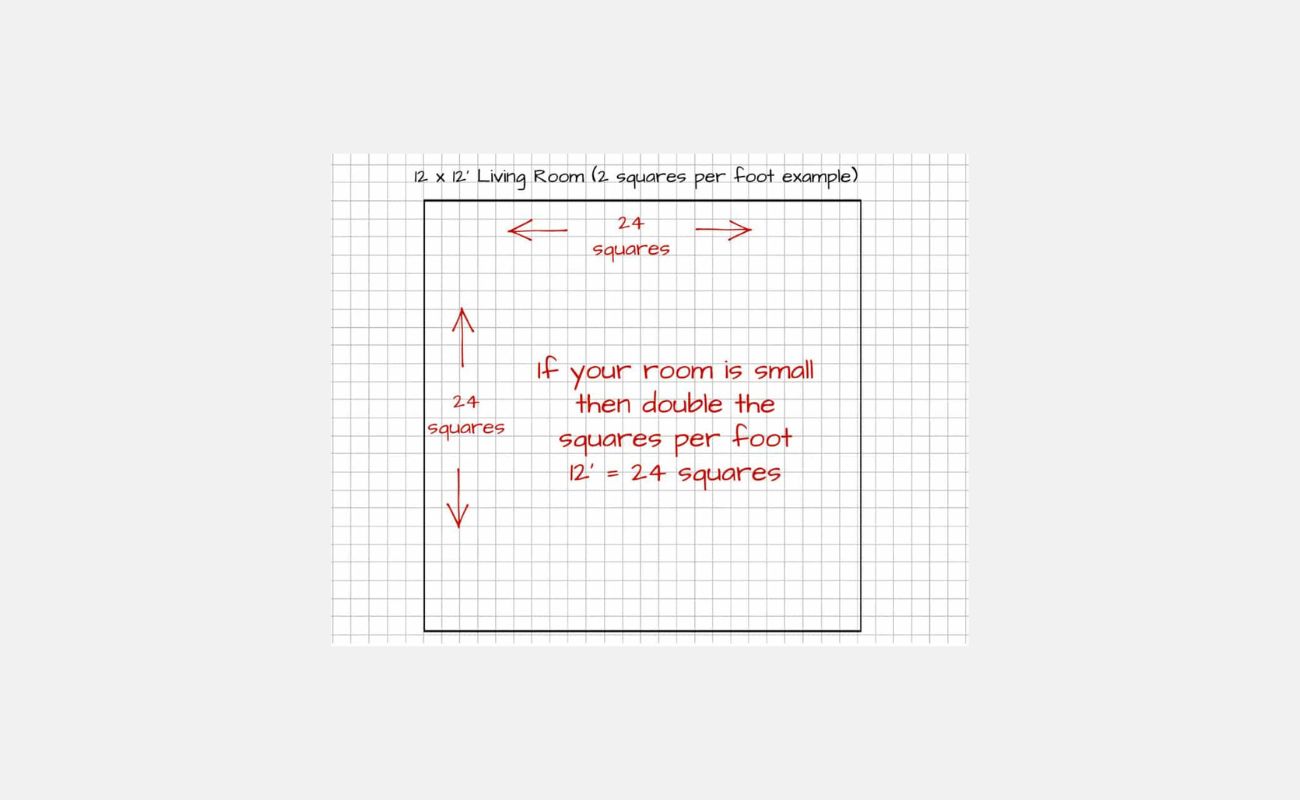
- Setting up Scale: Determine the appropriate scale for your floor plan. For architectural drawings, a common scale is 1/4″ = 1′-0″ (1:50). Set the scale in AutoCAD to ensure accurate measurements and dimensions.
By configuring these settings, you’ll have a well-prepared drawing space that allows you to create your house floor plan efficiently. Take some time to familiarize yourself with these tools and settings before moving on to the next step.
In Step 5, we will guide you through the process of drawing the walls of your house floor plan. Get ready to bring your design to life!
Read more: How To Design A House Floor Plan
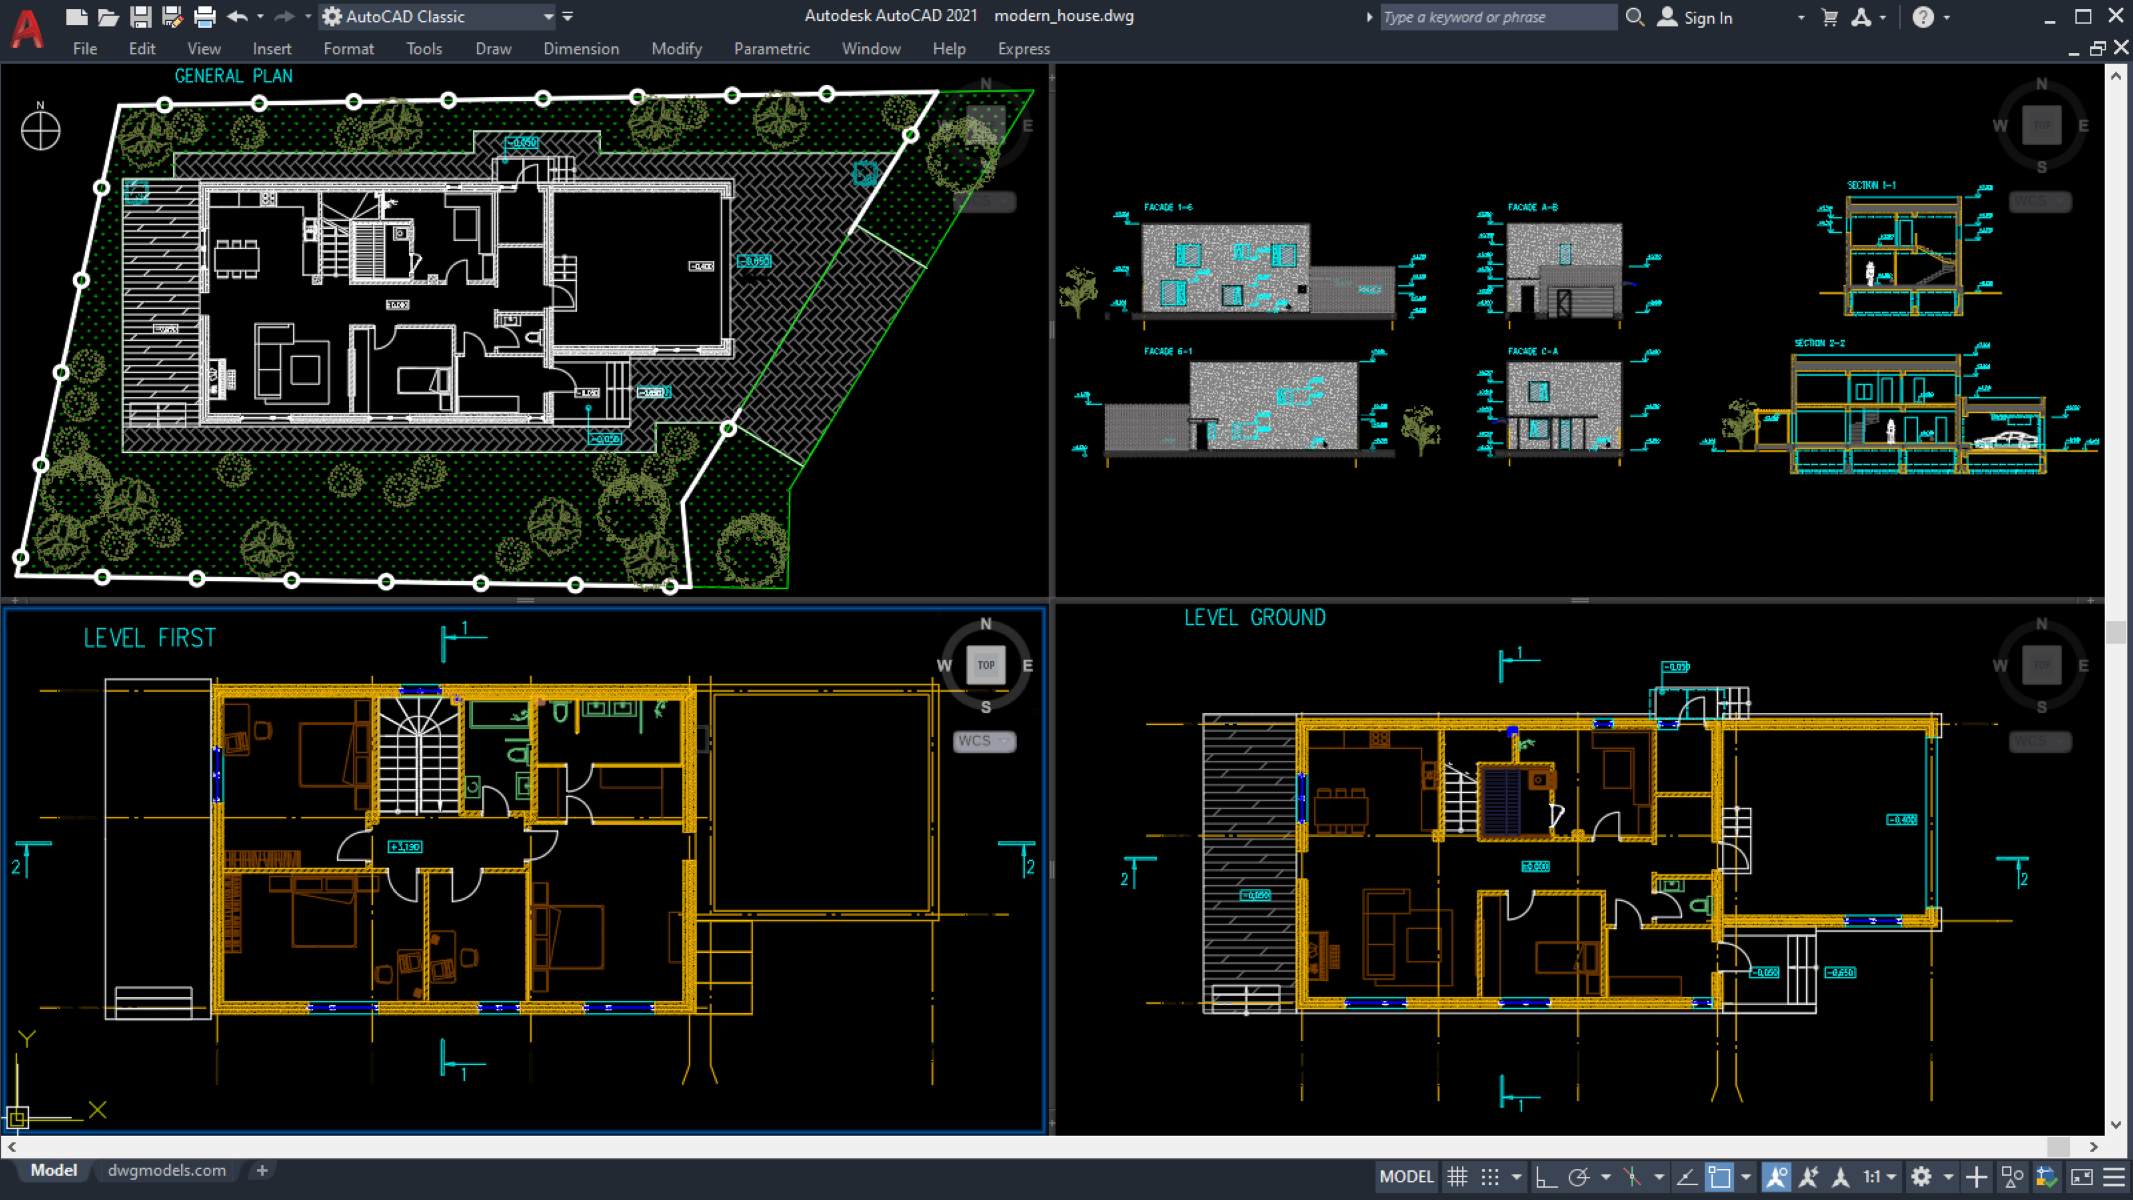
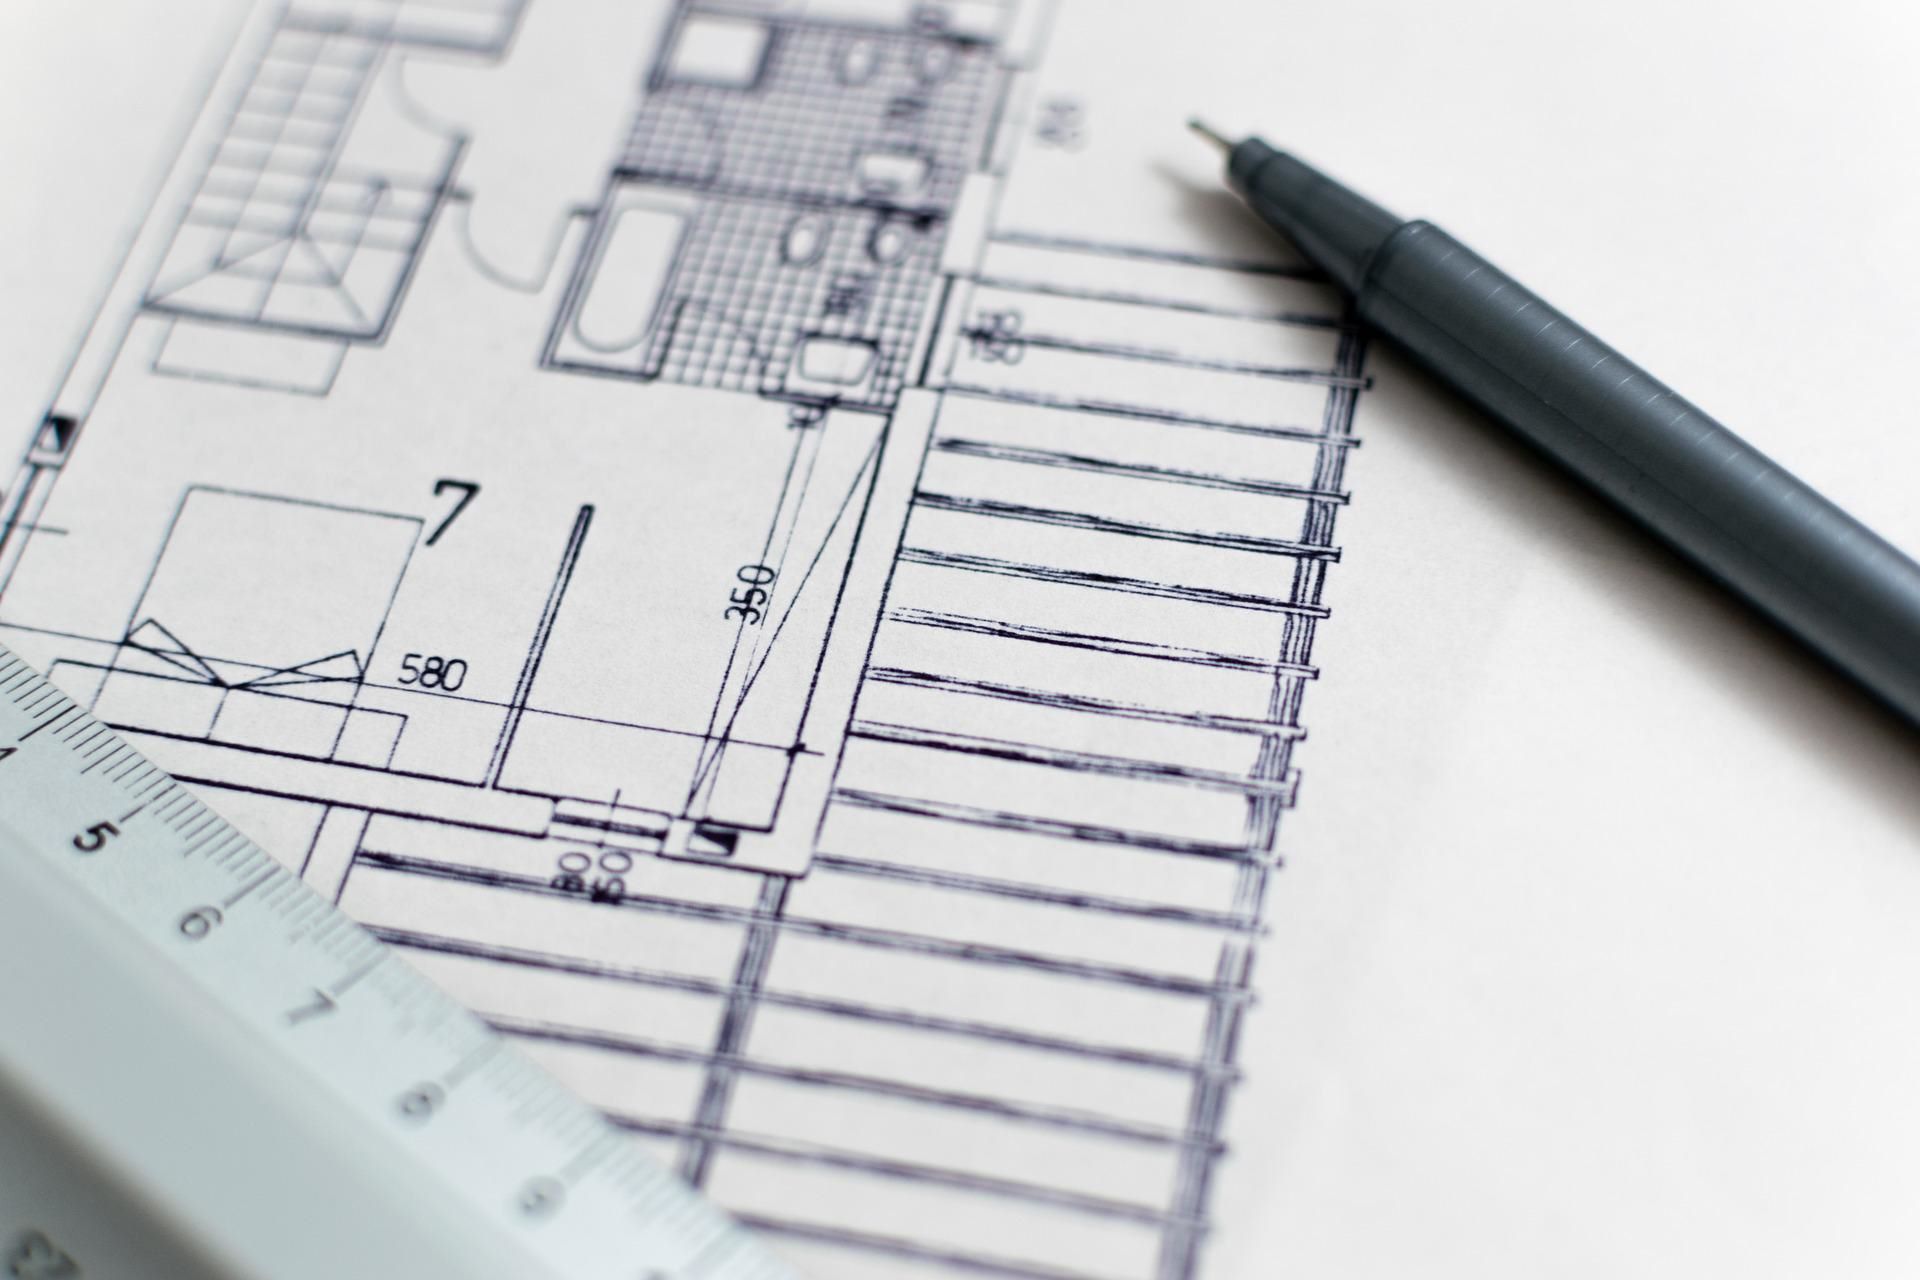
Step 5: Drawing the Walls
Now that you have set up the drawing space, it’s time to start drawing the walls of your house floor plan in AutoCAD. Walls form the structural framework of your design and define the layout of each room. Follow these steps to draw the walls:
- Select the Line Tool: Click on the “Line” tool from the toolbar or type “Line” in the command line to activate the line drawing tool.
- Set the Starting Point: Choose a starting point for your wall by clicking on a specific point in the drawing space. This will be one corner of the wall.
- Specify the Wall Length: Enter the length of the wall or use the mouse to drag and visually determine the desired length. If you have specific dimensions, you can type them directly in the command line.
- Draw the Wall: Click on the endpoint of the wall or type the desired angle to draw the first segment. Continue drawing the wall by clicking on the endpoints of each segment until you reach the final corner of the wall.
- Close the Wall: To close the wall and create a fully enclosed room, click on the starting point or type “C” to close the wall automatically.
- Continue Drawing: Repeat the above steps to draw all the walls of your house floor plan, ensuring that they meet at appropriate corners and create accurate room layouts.
Remember to use the snap and grid settings, as well as the ortho and polar tracking tools, to ensure that your walls are aligned and straight. You can also assign the walls to the appropriate layer for better organization and ease of editing.
Once you have drawn all the walls of your floor plan, you will have a basic layout of the rooms. In the next step, we will guide you through adding doors and windows to your design. Stay tuned for Step 6: Adding Doors and Windows!
When designing a house floor plan in AutoCAD, start by creating a rough sketch of the layout on paper to help visualize the space and then use the software’s tools to accurately draw the walls, doors, and windows to scale.
Step 6: Adding Doors and Windows
Now that you have drawn the walls of your house floor plan, it’s time to add doors and windows to create openings in the walls. Doors and windows provide access, ventilation, and natural light to the different rooms in your design. Follow these steps to add doors and windows in AutoCAD:
- Select the Door or Window Tool: Click on the appropriate door or window tool from the toolbar or type “door” or “window” in the command line to activate the tool.
- Specify the Placement Point: Choose the placement point for the door or window by clicking on the wall where you want to add it. Consider the design and functionality of each room when determining the placement.
- Set the Size and Type: Enter the dimensions of the door or window, including the width, height, and other relevant parameters. You can also choose from a library of pre-defined door and window types and sizes.
- Place the Door or Window: Click in the drawing space to place the door or window at the desired location. AutoCAD will automatically create the opening in the wall based on the specified dimensions.
- Adjust and Modify: After placing the door or window, you can use AutoCAD’s editing tools to adjust its position, size, or orientation as needed. You can also modify the properties of the door or window, such as the style, material, and swing direction.
- Repeat for Other Openings: Repeat the above steps to add doors and windows to all the necessary walls in your floor plan. Consider the relationships between rooms, traffic flow, and architectural aesthetics when deciding where to place openings.
By adding doors and windows, you bring your floor plan to life and create a more accurate representation of the actual spaces. Remember to assign the doors and windows to their respective layers for better organization and ease of editing.
In the next step, we will guide you through creating the interior layout of your house. Get ready to design the functional spaces of your dream home in Step 7: Creating Interior Layout!
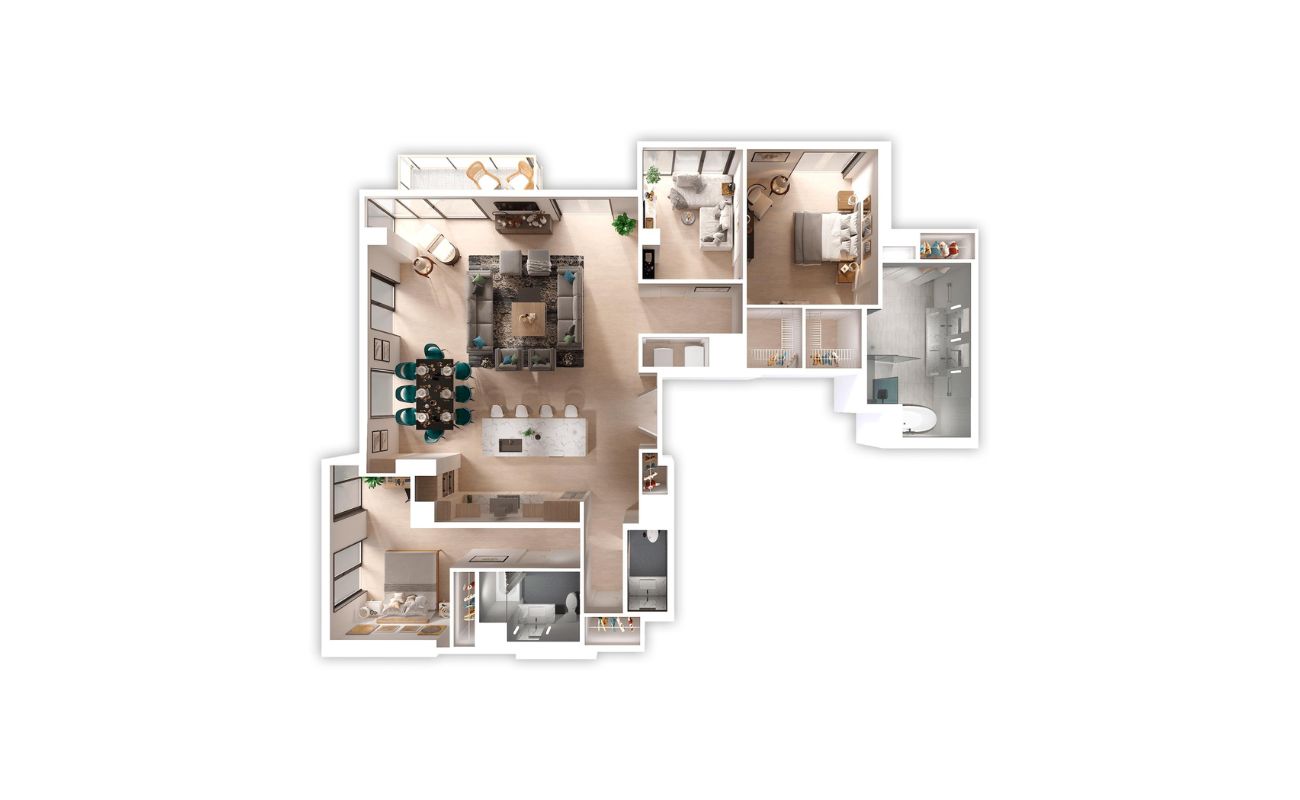
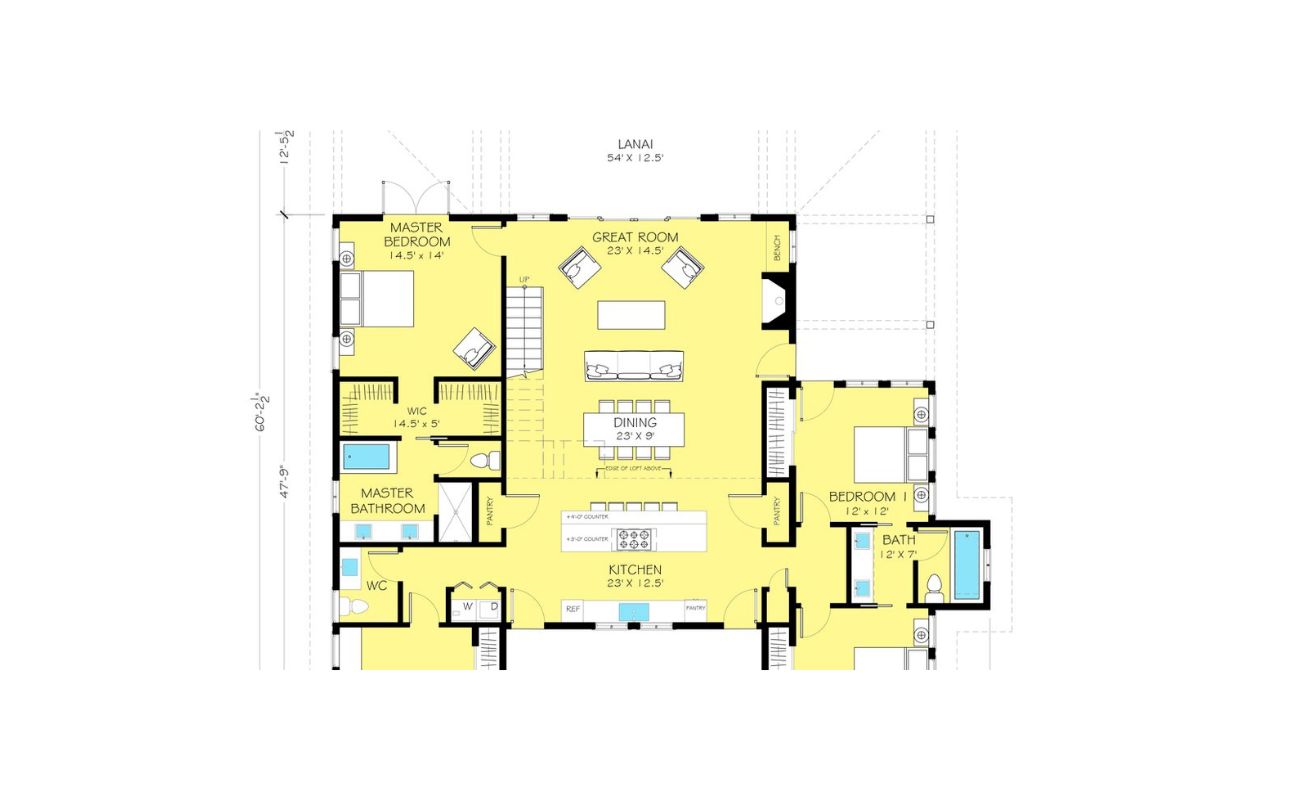
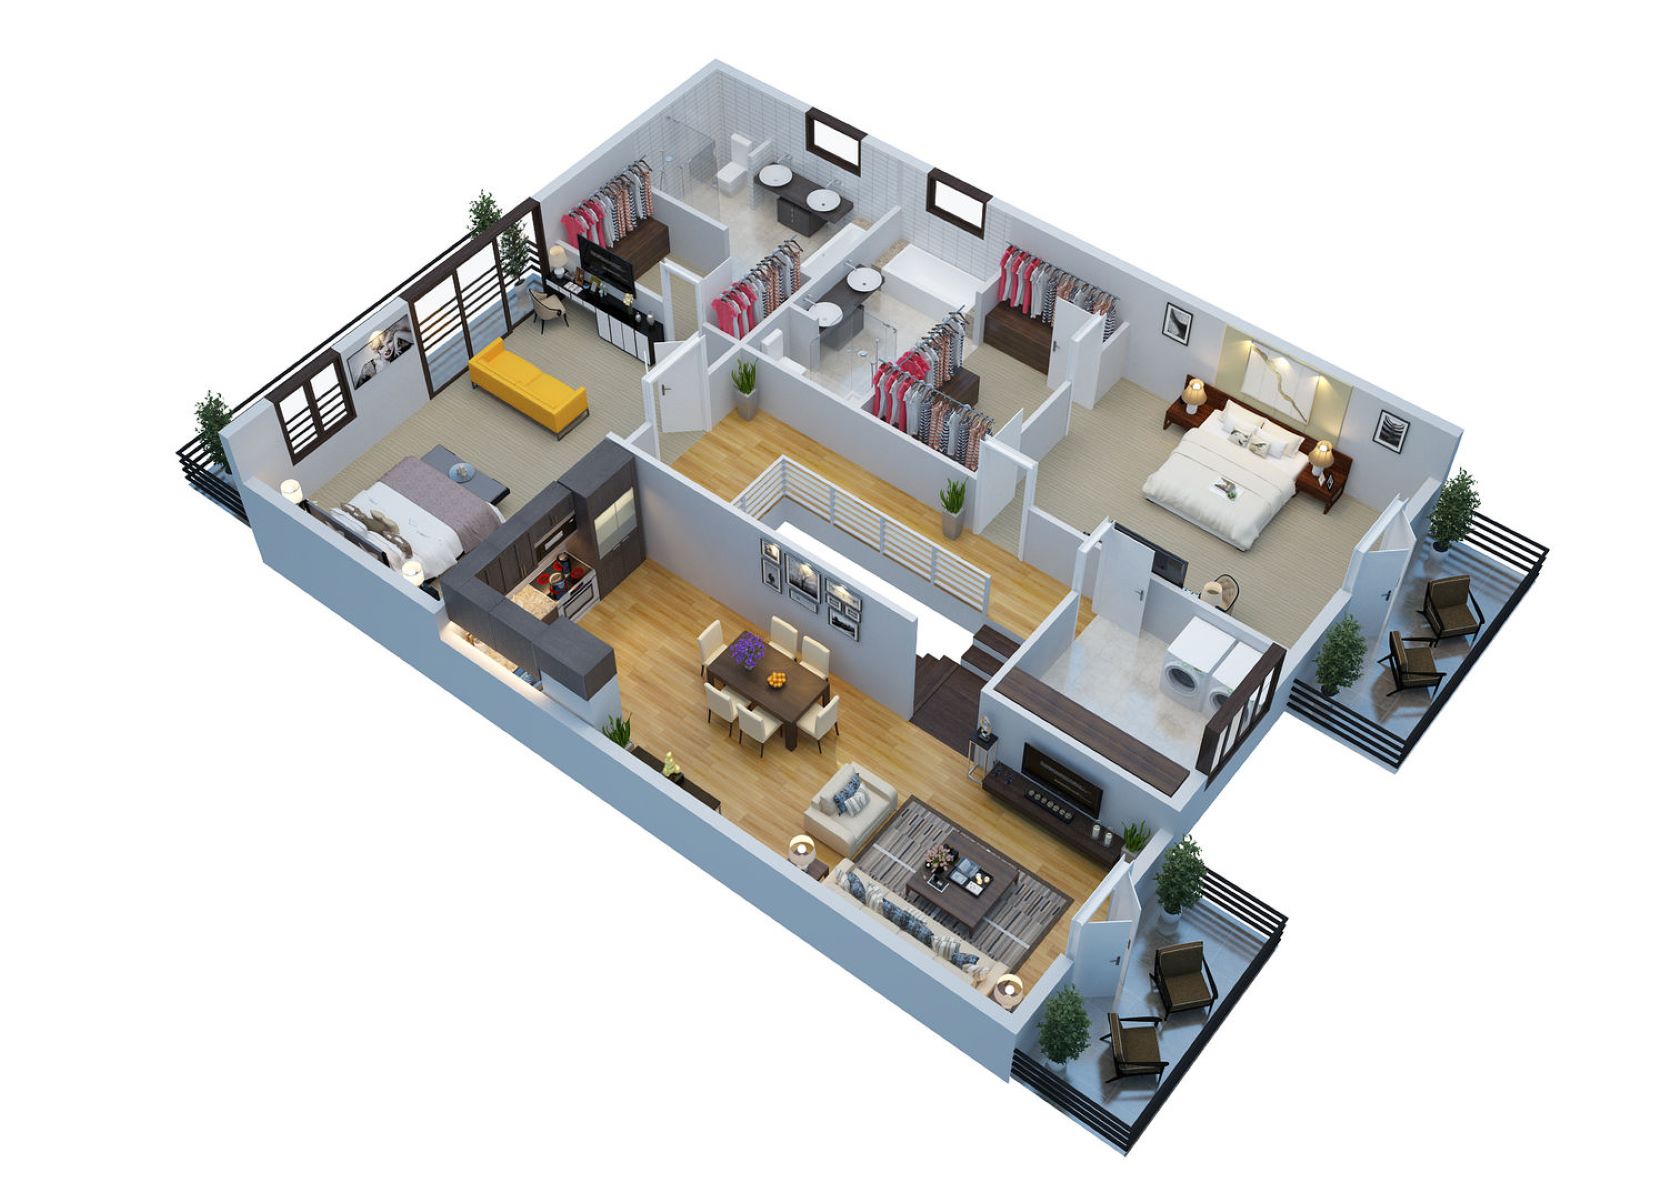
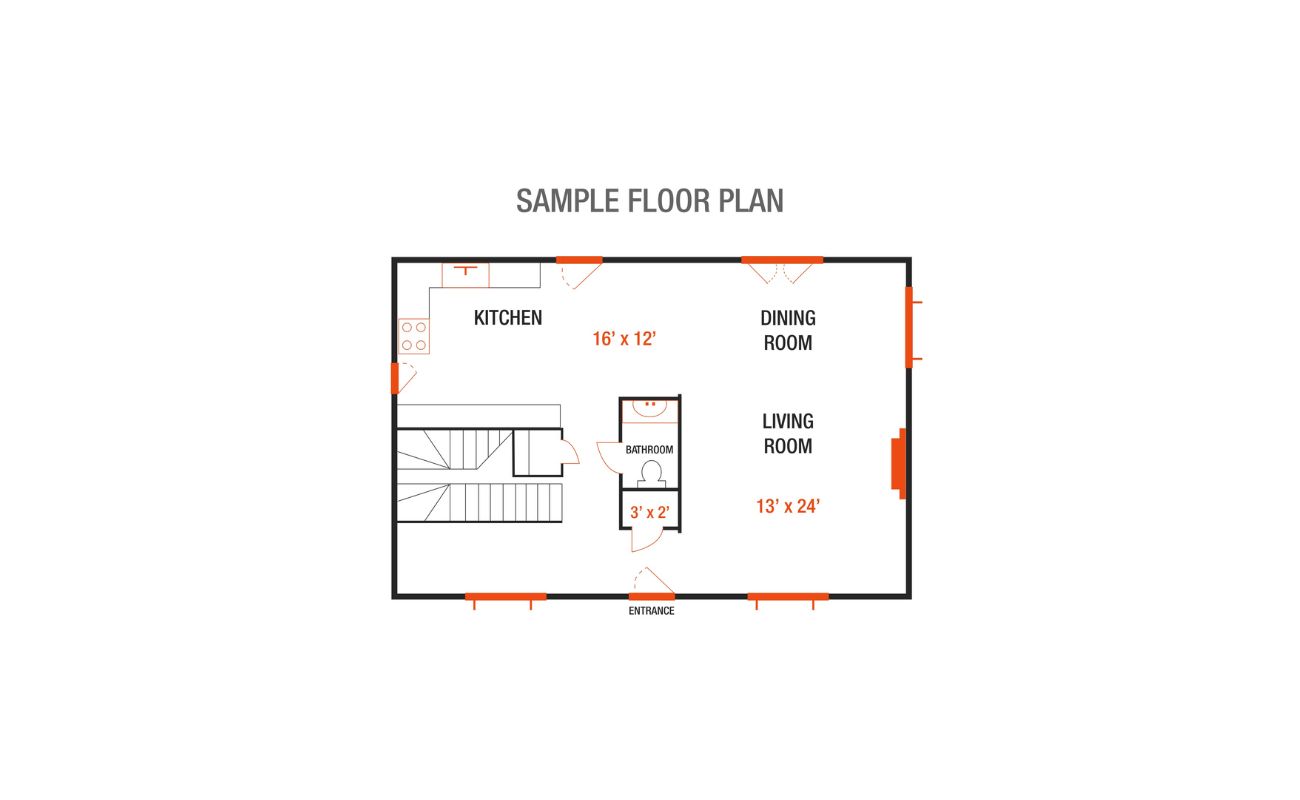
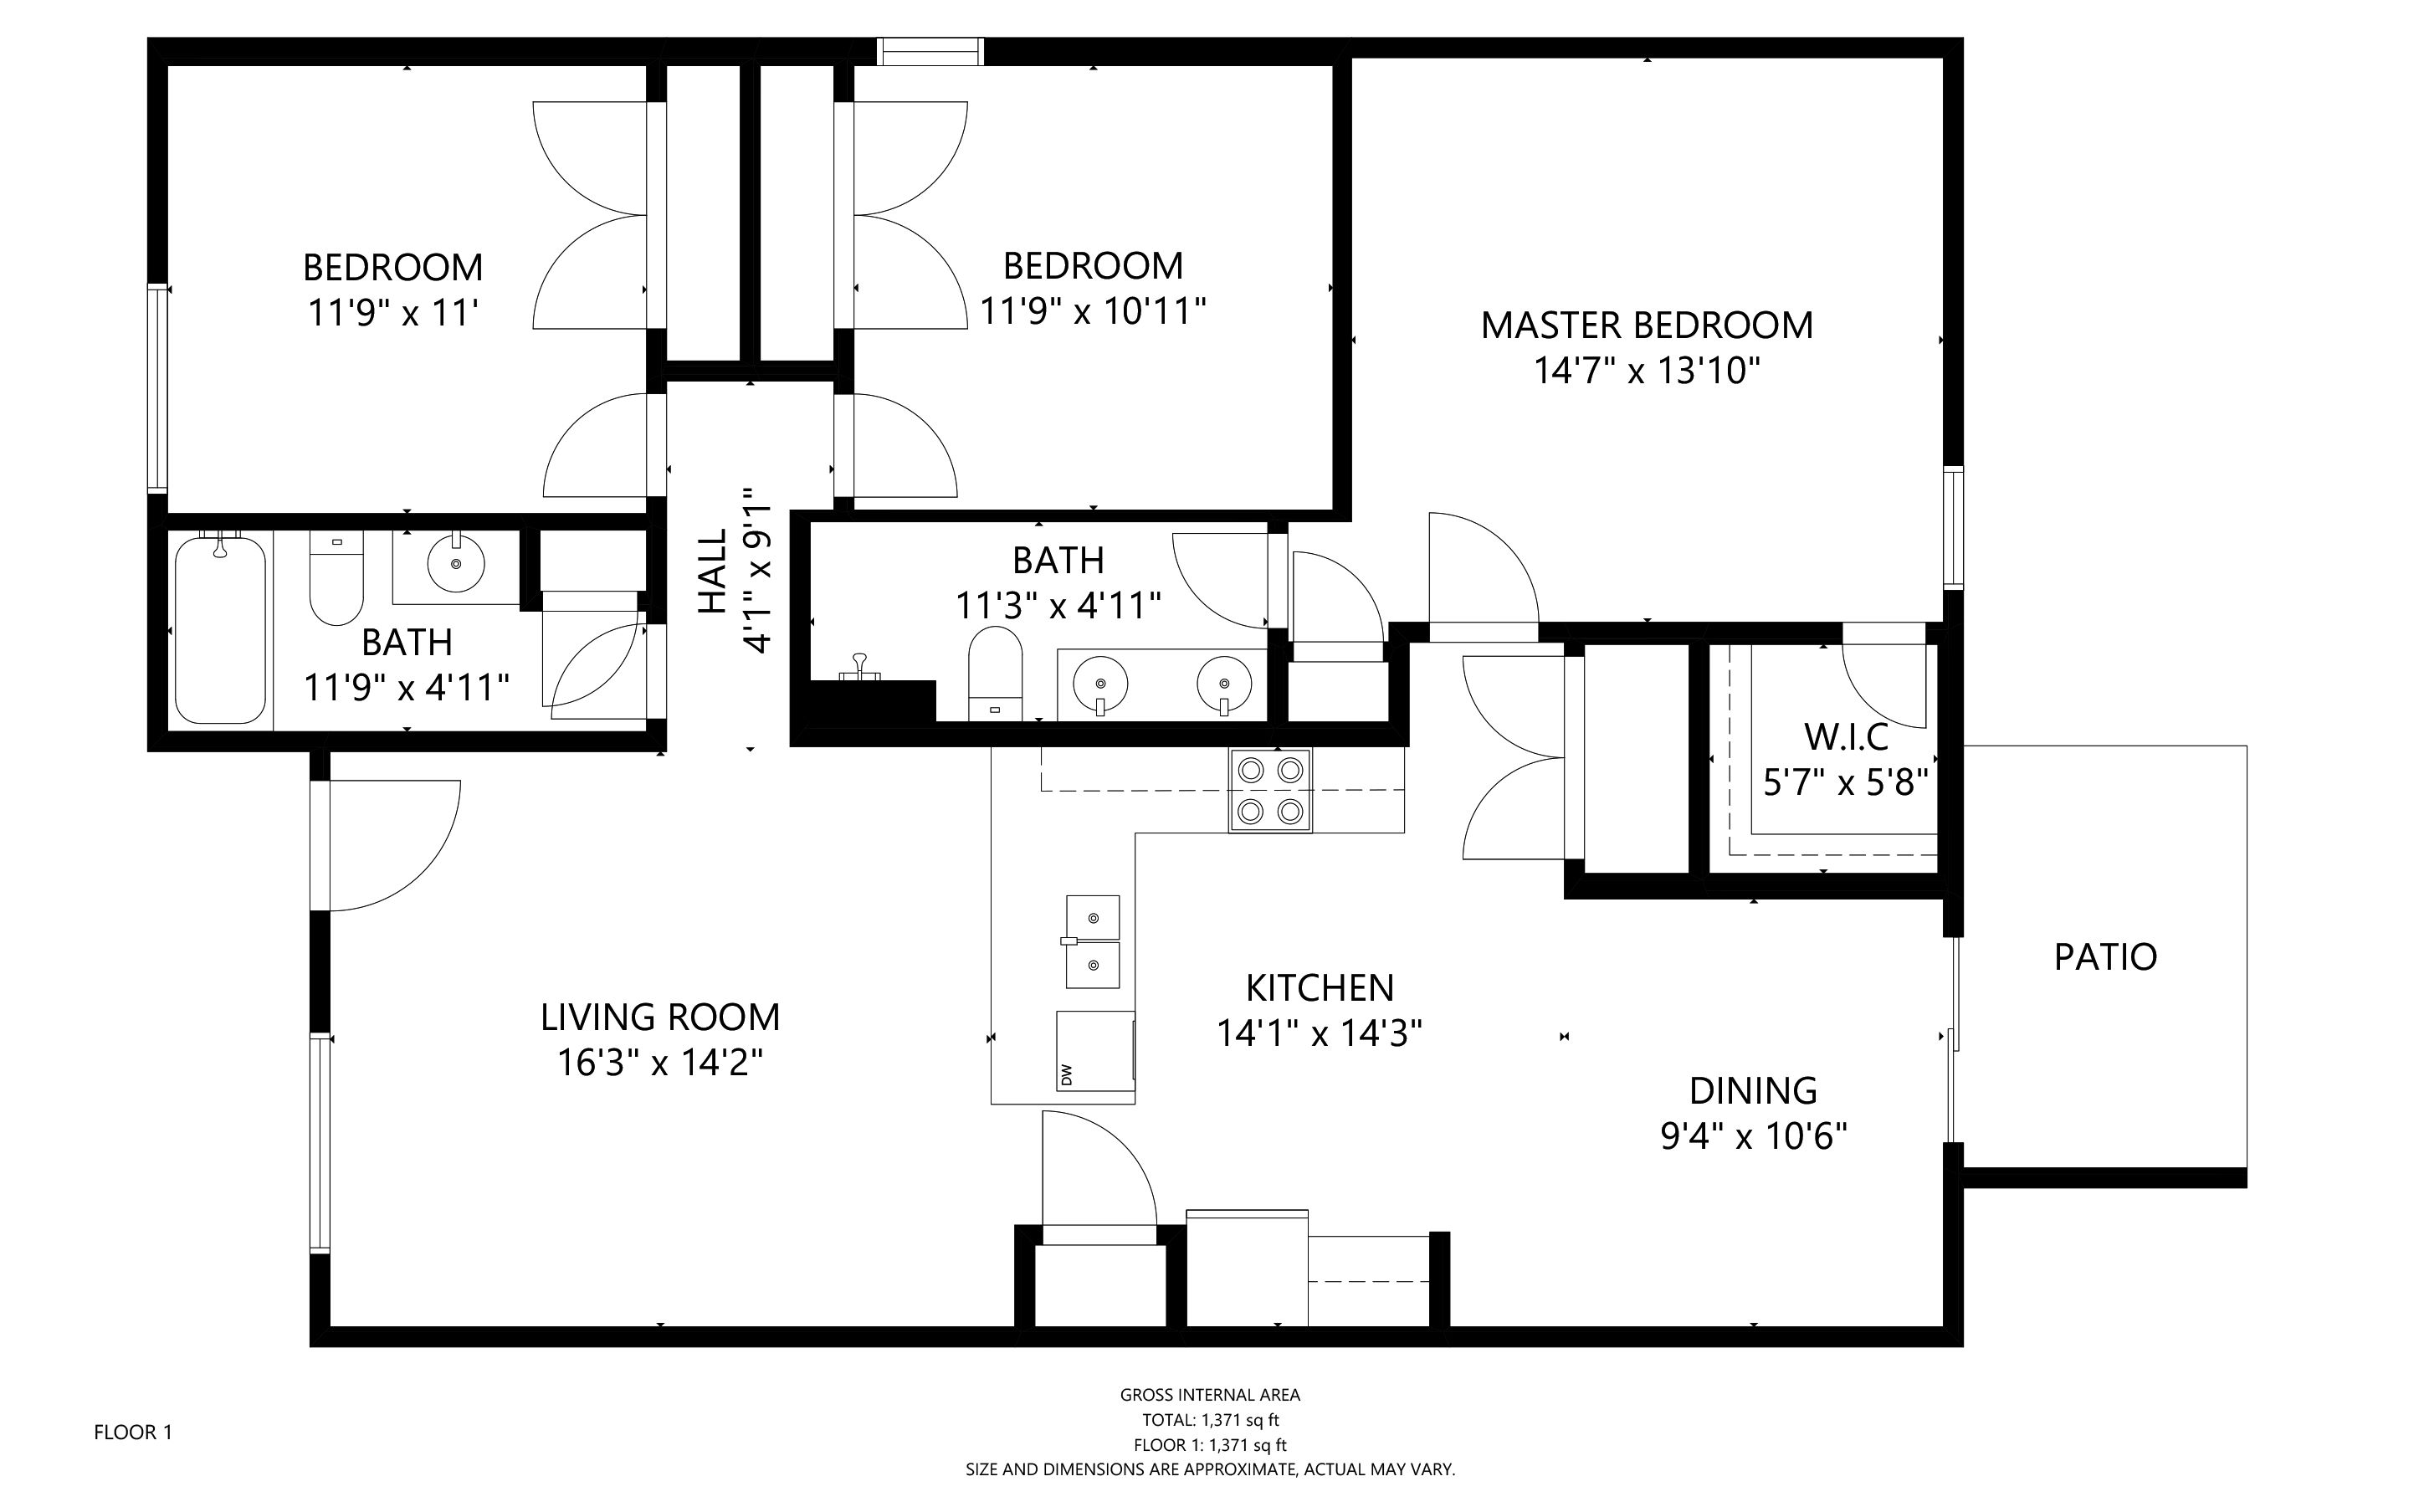
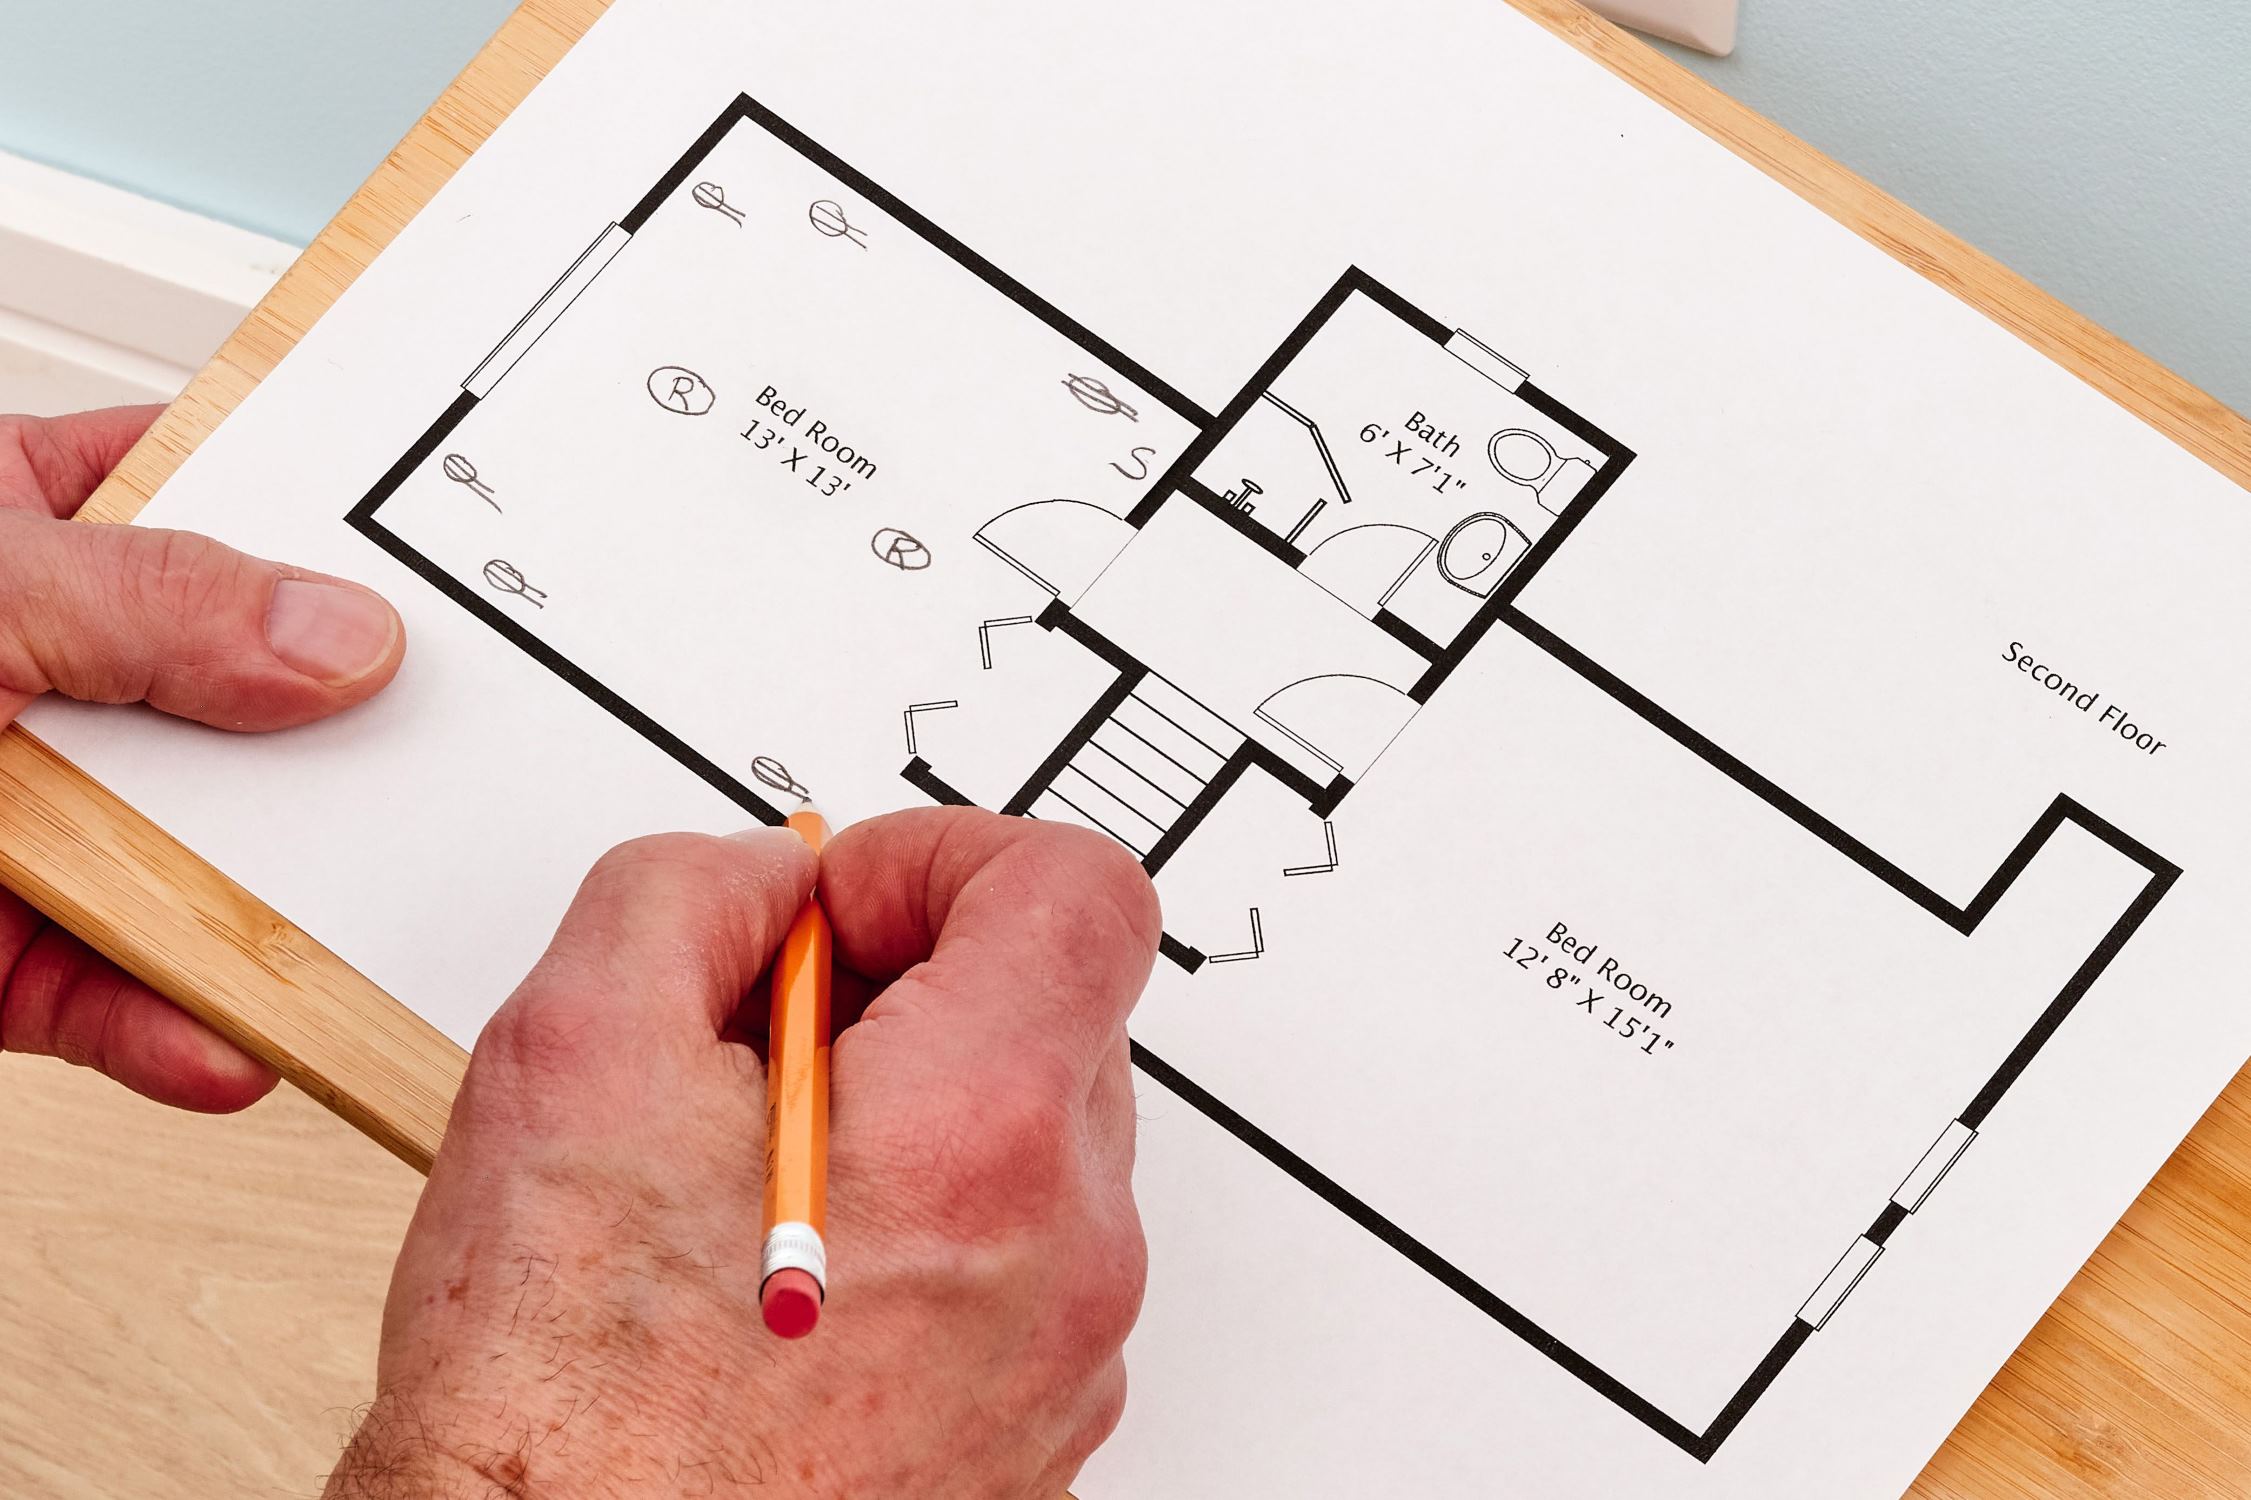
Step 7: Creating Interior Layout
Now that you have added walls, doors, and windows to your house floor plan, it’s time to focus on creating the interior layout. This step involves designing the individual rooms, including bedrooms, bathrooms, kitchen, living areas, and any other spaces you require. Here are the steps to create the interior layout in AutoCAD:
- Select the Drawing Tools: Choose the appropriate drawing tools such as rectangles, circles, or polylines to create the different elements of each room.
- Draw the Interior Walls: Use the drawing tools to create the interior walls of each room. Consider the dimensions and shape of the room as well as any architectural features you want to incorporate.
- Create the Room Layout: Use the drawing tools to add furniture, fixtures, and other elements to create the layout of each room. This includes beds, sofas, tables, cabinets, appliances, and more. Consider the functionality and flow of each space as you arrange the elements.
- Add Detailing: Use additional drawing tools to add details such as stairs, columns, or built-in shelves to enhance the design and make each room more visually appealing.
- Pay Attention to Scale and Proportions: Ensure that the dimensions and proportions of the furniture and fixtures are accurate and realistic. This will help you visualize the space and determine if it meets your requirements and preferences.
- Continue Room by Room: Repeat the above steps for each room in your house floor plan. Take your time to create a detailed and well-thought-out interior layout that reflects your personal style and functional needs.
Remember to save your progress regularly and make use of layers to organize and manage the different elements of your interior layout. This will allow for easy editing and customization if needed.
In the next step, we will guide you through adding dimensions and annotations to your floor plan. Stay tuned for Step 8: Adding Dimensions and Annotations!
Step 8: Adding Dimensions and Annotations
After creating the interior layout of your house floor plan, it’s important to add dimensions and annotations to provide clear information and measurements. Adding dimensions helps convey the scale and size of each room, while annotations provide additional details and notes about the design. Follow these steps to add dimensions and annotations in AutoCAD:
- Select the Dimension Tool: Click on the “Dimension” tool from the toolbar or type “DIM” in the command line to activate the dimensioning tool.
- Choose the Dimension Style: AutoCAD offers various dimension styles that define the appearance and formatting of the dimensions. Select the appropriate style or customize it according to your preferences by modifying text size, arrowheads, and more.
- Place the Dimensions: Click on the objects or wall corners you want to dimension. AutoCAD will automatically display the dimensions based on the selected objects. Ensure that the dimensions are clear and easy to read.
- Add Linear and Angular Dimensions: Use the linear dimension tool to measure distances along walls, between objects, or any other required measurements. You can also use the angular dimension tool to measure angles between walls or other elements.
- Add Text and Annotations: Use the text tool to add annotations and notes to your floor plan. This can include room names, material specifications, or any other relevant information that you want to convey. Position the text appropriately and ensure that it’s legible.
- Review and Edit: Once you have placed the dimensions and annotations, review them to ensure accuracy and readability. Make any necessary adjustments or edits to ensure that the information is clear and understandable.
Adding dimensions and annotations provides valuable information to both yourself and others who will be working with the floor plan. It helps in understanding the layout and design intent, making it easier to communicate and collaborate with contractors or other stakeholders.
In the next step, we will guide you through adding furniture and fixtures to your floor plan. Get ready to add the final touches in Step 9: Adding Furniture and Fixtures!
Read more: How To Make A House Floor Plan
Step 9: Adding Furniture and Fixtures
As you near the completion of your house floor plan in AutoCAD, it’s time to add the finishing touches by incorporating furniture and fixtures. Adding furniture and fixtures helps you envision the spaces and create a realistic representation of your design. Follow these steps to add furniture and fixtures in AutoCAD:
- Choose the Furniture Symbols: AutoCAD offers a library of 2D furniture symbols in its blocks collection. Explore the blocks library or search online for additional furniture symbols that match your design style and requirements.
- Insert Furniture Symbols: Use the “Insert” command or the “Insert Block” tool to insert the furniture symbols into your floor plan. Position them in the appropriate rooms and spaces according to your design concept.
- Scale and Adjust: After inserting the furniture symbols, you may need to scale and adjust their size to reflect the actual dimensions. Ensure that the furniture is accurately sized relative to the room and other elements in the floor plan.
- Arrange and Organize: Arrange the furniture and fixtures in a way that maximizes functionality and creates a visually appealing layout. Consider traffic flow, natural light, and the overall ambiance you want to achieve in each room.
- Add Fixtures and Appliances: Incorporate fixtures and appliances such as sinks, toilets, kitchen appliances, and lighting fixtures into your floor plan. Place them in their appropriate locations, taking into account plumbing and electrical connections.
- Experiment and Iterate: Don’t be afraid to experiment and iterate with different furniture arrangements. You can try multiple options until you find the ideal layout that meets your functional and aesthetic preferences.
Adding furniture and fixtures not only enhances the visual presentation of your floor plan but also aids in understanding the overall flow and functionality of the space. It allows you to evaluate the feasibility of your design choices and make any necessary adjustments before construction or renovations begin.
With the furniture and fixtures in place, you’re ready for the final step in designing your house floor plan. In Step 10, we will guide you through finalizing and fine-tuning your floor plan. Stay tuned!
Step 10: Finalizing the House Floor Plan
Congratulations! You have reached the final step of designing your house floor plan in AutoCAD. In this step, you will fine-tune and finalize your floor plan before sharing it with others or proceeding with construction. Follow these steps to complete the final touches of your floor plan:
- Review and Refine: Take a close look at your floor plan and review each element carefully. Look for any inconsistencies, errors, or areas that need improvement. Refine the design by making necessary adjustments, such as resizing rooms or repositioning furniture, to ensure a harmonized and aesthetically pleasing layout.
- Check for Compliance: Ensure that your floor plan complies with local building codes and regulations. Double-check the dimensions, clearances, and other requirements specified by the governing authorities to avoid any potential issues during construction.
- Conduct a Walkthrough: Mentally walk through your floor plan, visualizing the flow of movement and assessing its functionality. Verify that there is sufficient space for passage, comfortable furniture arrangement, and easy navigation between different areas. Make any necessary changes to optimize the layout and user experience.
- Get Feedback: Seek feedback from others, such as family members, friends, or professionals in the field, to gain different perspectives on your design. Consider their suggestions and incorporate any valuable insights that can enhance the overall design and functionality of your house floor plan.
- Prepare Final Documentation: Once you are satisfied with your floor plan, prepare the final documentation. This may include creating separate sheets with floor plans for each level, creating a legend to explain symbols and abbreviations, and adding any necessary notes or additional information that will be helpful to contractors or builders.
- Save and Archive: Save a copy of your final floor plan in a secure location for future reference. It’s also a good idea to create backups to avoid any potential loss of data.
Congratulations on completing your house floor plan in AutoCAD! By following these steps and putting in the time and effort, you have created a comprehensive and detailed floor plan that captures your vision and meets your requirements. Your floor plan is now ready to be shared, reviewed, and implemented in the construction or renovation process.
Remember, designing a house floor plan is just the beginning of the journey. As the project progresses, you may need to make additional adjustments or modifications. Stay open to new ideas and be flexible in adapting to changing needs and circumstances.
Thank you for joining us on this step-by-step guide. We hope it has been helpful in your floor plan design process. Happy designing!
Conclusion
Designing a house floor plan in AutoCAD is an exciting and rewarding journey that allows you to bring your dream home to life. Throughout this comprehensive guide, we have walked you through the step-by-step process of creating a floor plan that meets your requirements and reflects your personal style. By understanding the basics of AutoCAD, gathering the necessary requirements, starting a new drawing, setting up the drawing space, drawing walls, adding doors and windows, creating the interior layout, adding dimensions and annotations, incorporating furniture and fixtures, and finalizing your floor plan, you have gained valuable knowledge and insights into the world of architectural design.
By leveraging the power of AutoCAD and applying sound design principles, you have been able to create a detailed, accurate, and visually appealing representation of your future home. You have considered factors such as size, style, functionality, building codes, accessibility, and outdoor spaces to customize your floor plan to your unique needs and preferences.
Remember that designing a house floor plan is a process that requires attention to detail, creativity, and continuous refinement. Be open to feedback, explore different ideas, and adapt as necessary to ensure the best possible outcome for your project.
Now equipped with the skills and knowledge gained from this guide, you are well prepared to tackle the challenge of designing a house floor plan in AutoCAD. Whether you’re an aspiring architect or someone looking to personalize their living space, AutoCAD provides you with the tools you need to unleash your creativity and transform your vision into reality.
So, take what you’ve learned and let your imagination soar. Design a floor plan that not only meets your functional needs but also reflects your unique personality and style. Embrace the possibilities, and enjoy the journey of creating your dream home!
Frequently Asked Questions about How To Design A House Floor Plan In AutoCAD
Was this page helpful?
At Storables.com, we guarantee accurate and reliable information. Our content, validated by Expert Board Contributors, is crafted following stringent Editorial Policies. We're committed to providing you with well-researched, expert-backed insights for all your informational needs.


0 thoughts on “How To Design A House Floor Plan In AutoCAD”